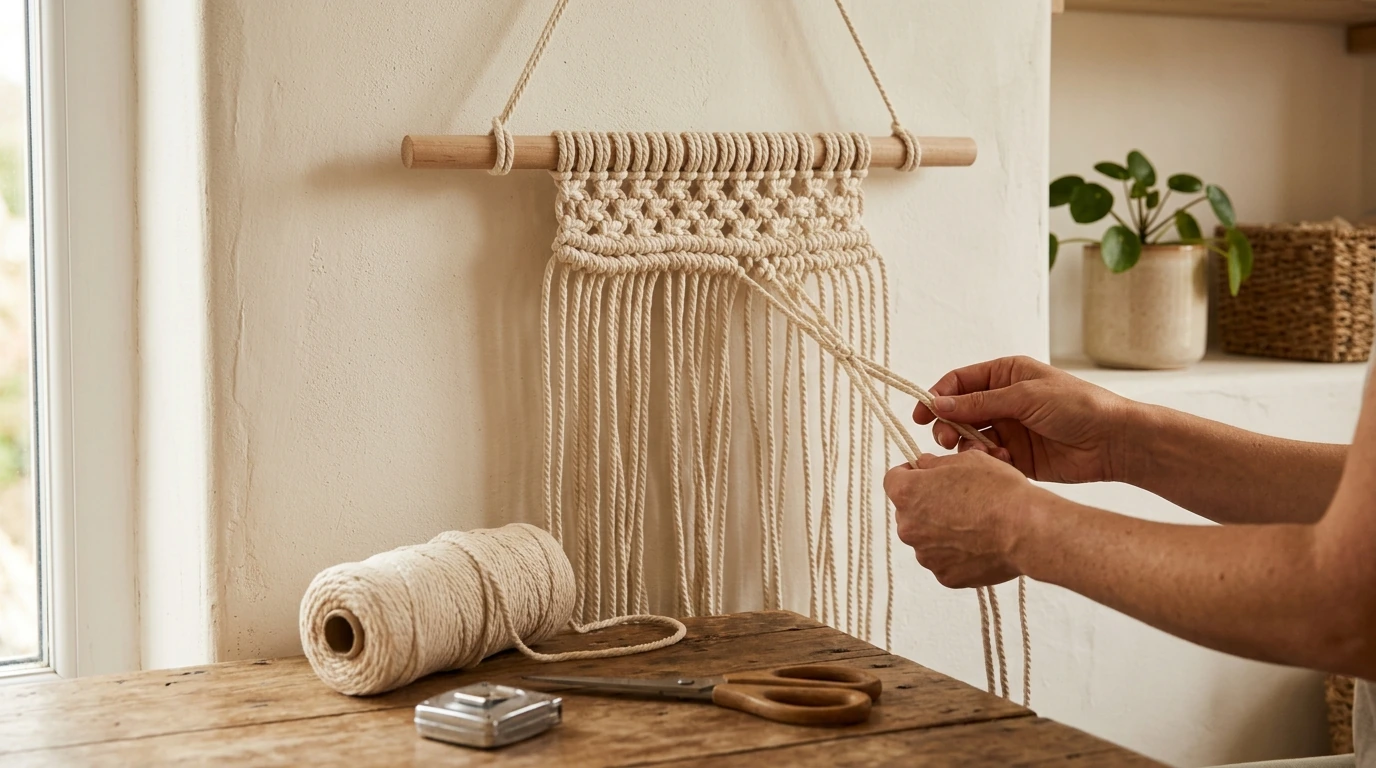
Macramé wall hangings have a rare talent: they soften a room without requiring you to repaint, replace furniture, or commit to a full style overhaul. The moment you add knotted fiber to a wall, you bring in texture, warmth, and a handmade “exhale” that balances sharp corners, glossy surfaces, and blank space. For more guidance, see Master the Craft with 20 Projects for Wall Art, Plant Hangers ….
In modern and minimalist rooms, macramé breaks up flat walls and hard edges with gentle dimension. In cozy spaces, it layers in that collected, personal feel—like the room has a story. And if you’re working with limited square footage, a wall hanging refreshes an entryway, reading nook, or bedside wall without taking up any floor space. For further reading, see Macrame.
Macramé also adapts beautifully: cord thickness, cord color, fringe length, and hanging base (dowel vs. ring vs. driftwood) can all shift the vibe from airy and coastal to bold and modern, earthy and grounded, or clean and monochrome.
If you’re new to macramé, the hardest part is usually not the knot itself—it’s knowing what to practice, what tools matter, and how to turn “random knots” into a wall hanging that looks intentional. Our team put together Knot Your Décor with Macramé Wall Hangings – A Beginner-Friendly Ebook on Macrame Wall Hanging Basics, Knots, Tools & Creative Wall Art to make that first project feel doable and satisfying.
Inside, you’ll move step by step through:
For a quick background on where macramé fits in craft history, you can also explore definitions and context from Britannica’s macramé entry and beginner-friendly references from The Spruce Crafts.
You don’t need a huge knot library to start making wall art. A small set of repeatable knots gets you surprisingly far—especially if you prioritize consistency over speed. The same knot can look crisp and architectural or loose and relaxed depending on tension, cord placement, and how often you stop to check alignment.
One of the easiest ways to improve quickly is to make a short sampler: a small practice strip where you repeat each knot in a neat block. That becomes your reference guide later when you’re mid-project and want to confirm how a knot “should” look.
| Knot focus | What it’s great for | Beginner tip |
|---|---|---|
| Lark’s head (mounting) | Attaching cords to a dowel or ring | Keep the starting line even before adding any pattern |
| Square knot | Clean panels, simple patterns, classic macramé look | Count knots in sets so both sides stay balanced |
| Half hitch / double half hitch | Diagonals, waves, clean lines, structure | Use a firm “holding cord” to prevent drifting |
| Gathering knot (wrap knot) | Neat finishes and bundled sections | Wrap smoothly and tighten gradually for a clean coil |
Macramé supplies can get complicated fast, but your first wall hanging doesn’t need a long shopping list. What matters most is picking cord that matches the look you want and using a stable hanging base that keeps your top edge straight.
If you want an all-in-one comb-style tool on hand for fringe work (and plenty of other uses around the home), we also stock a practical set here: Luxury Dog Washing Brush Hair Remover Glove & Comb Tool Set for Grooming Cats & Dogs. Many makers like having a small comb available for separating fringe strands gently—start slow and test on a small section first so you don’t over-fray.
And if you’re building an overall boho-leaning corner—wall hanging, warm lighting, a plant, and a small styling detail—simple accessories can tie the vibe together. Our team also carries Hollowed Out Stainless Steel Earrings for Women if you want a subtle nod to the same airy, sculptural feel in your personal style.
A small rectangular panel is the easiest start: mount your cords with lark’s head knots, make a few rows of square knots, and finish with a simple fringe trim. Keeping the pattern repeat short helps you focus on consistent tension and clean spacing.
A practical rule is to cut each cord several times longer than your intended finished length, then add extra for dense knot sections and any diagonal lines. Width, knot density, and how long you want the fringe will all change the final amount, so slightly overcutting is safer than coming up short.
Uneven rows usually come from inconsistent tension, letting a holding cord drift during hitch knots, or losing track of knot counts across the row. Checking alignment every few rows and correcting early keeps small shifts from becoming a noticeable slant.




Leave a comment