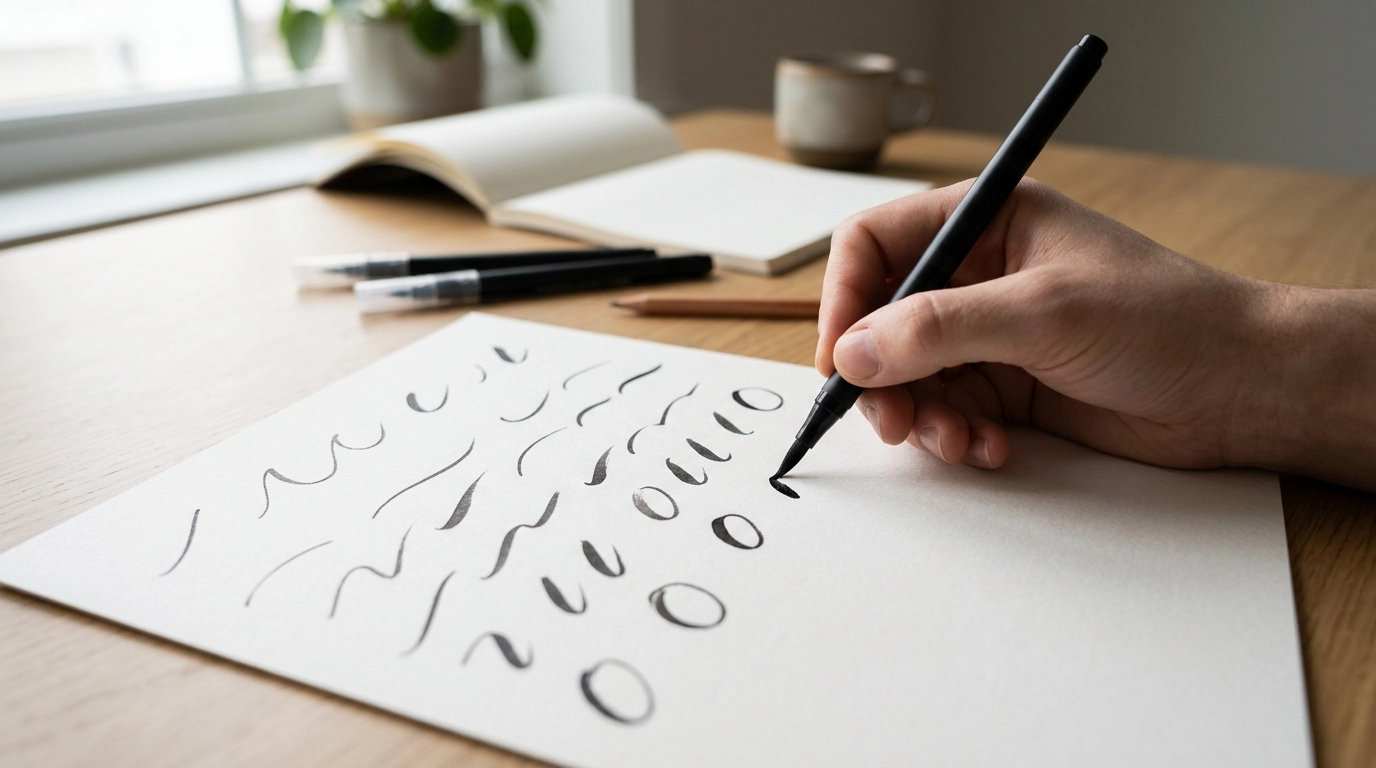
Brush lettering looks effortless on the page—until the pen hits paper and the lines wobble, the pressure feels unpredictable, and the “pretty” script refuses to appear. A better approach is simple: learn the few mechanics that control every letter, then practice with a short, repeatable routine. Our team built Mastering Brush Lettering for that exact start: clear fundamentals, guided drills, and a practice checklist that turns “random doodling” into real progress.
Brush lettering is pressure-based writing. Light pressure creates thin upstrokes; heavier pressure creates thick downstrokes. The most common beginner frustration comes from trying to draw complete letters before you can reliably control that pressure change.
Once you treat lettering as a set of repeatable motions—strokes first, then letters, then words—your results get consistent faster. Small shifts in speed, angle, and grip can dramatically change line quality, so a structured routine matters because it helps you notice what changed when a line suddenly improves (or falls apart).
Your goal isn’t “press hard on downstrokes.” Your goal is switching between hairline-thin and full-pressure thick without leaving blobs where you transition. Practice lifting earlier on the way up and adding pressure gradually on the way down.
Keep a steady angle so the brush tip behaves predictably. When the angle constantly shifts, the brush hits the page differently and you’ll see uneven widths, streaky fills, and inconsistent thin lines.
For longer curves and straight strokes, aim for shoulder-and-arm movement instead of finger-only motion. Finger-only movement tends to create tiny stops that show up as shaky edges. Pace yourself: slow enough for control, but not so slow that you create stop-and-go “edges” on thick strokes.
| What shows up on the page | Likely cause | Fast fix to try next |
|---|---|---|
| Thick downstrokes look scratchy or streaky | Too little pressure or uneven speed | Increase pressure gradually; keep the stroke moving instead of stopping mid-line |
| Upstrokes come out thick | Pressing too hard on the upstroke | Lift pressure earlier; imagine “gliding” up with just the tip |
| Corners look bumpy | Pausing at the turn | Round the turn slightly; practice slow curves before sharp angles |
| Letters lean inconsistently | No consistent slant guide | Use light slant lines; keep the baseline steady before adding flourishes |
If you want modern script that looks intentional (not “accidentally fancy”), sequence matters:
Consistency beats marathon sessions. Here’s the practice loop we use because it keeps your focus narrow and your progress obvious:
Mastering Brush Lettering – Beginner Brush Calligraphy Guide, Digital eBook & Practice Checklist for Modern Hand Lettering Skills is designed to keep you out of the “practice everything, improve nothing” trap.
| Goal | Helpful tool choice | Why it helps |
|---|---|---|
| Clean thin upstrokes | Smaller brush tip or firm brush pen | More control during light-pressure lines |
| Smooth thick downstrokes | Brush pen with consistent ink flow | Reduces streaking and uneven fills |
| Better spacing and slant | Guideline sheet (printed or digital) | Creates visual anchors for height and angle |
| Longer pen life | Smoother paper | Less wear on the brush tip |
If you want extra background on writing traditions and letterforms, you can explore the Smithsonian Libraries’ calligraphy resources at https://library.si.edu/research/calligraphy and the Met’s writing and scripts context at https://www.metmuseum.org/toah/.
You can usually see visible gains within a week if you practice 15–20 minutes a day and focus on strokes first. The improvements compound because pressure transitions and consistent slant get easier with repetition, not longer sessions.
Yes—tablet practice works as long as you train the same fundamentals: controlled pressure, steady angle, and consistent baseline and slant. Using guidelines and sticking with one brush setting helps your hand learn patterns that transfer into cleaner script.
Start with strokes. Letters are built from repeated stroke components, so when your thin upstrokes and thick downstrokes are controlled, the alphabet becomes assembly—not guesswork.






Leave a comment