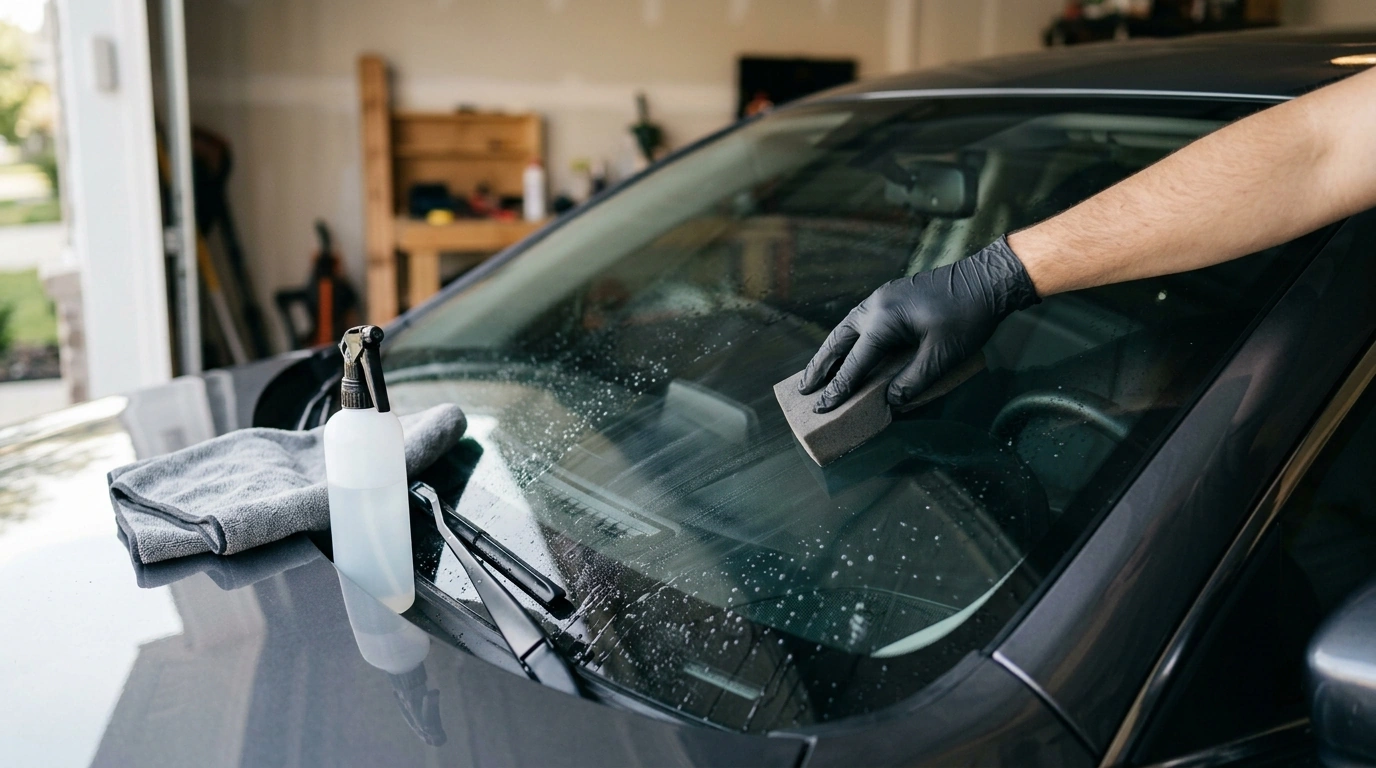
A clay sponge is one of the quickest ways to remove bonded contamination that regular washing leaves behind. When paint or glass still feels rough after a proper wash, that “gritty” texture is often embedded road film, rail dust, or overspray that needs mechanical decontamination (with plenty of lubrication) to release safely. Used correctly, a clay sponge helps glass feel smoother for more consistent wiper performance, improves clarity by removing stuck-on particles, and preps paint so waxes, sealants, and spray ceramics can bond more evenly.
If you’re adding a decon step to your routine, start with a purpose-built tool like the Magic Clay Sponge Cleaning Eraser Hand Wax Polish Pad for Car Glass & Auto Detailing, and pair it with careful technique and clean towels.
A clay sponge targets contamination that’s bonded to the surface—stuff that survives a standard wash because it’s stuck into pores, clear coat, or glass. With lubrication, the clay polymer face glides while “shearing” contaminants away from the top layer so the surface feels smooth again.
| Contamination | Where it shows up | What you’ll notice | Clay sponge outcome |
|---|---|---|---|
| Industrial fallout / rail dust | Paint, glass | Rough, gritty feel; specks | Lifts bonded particles; smoother finish |
| Road film | Lower panels, bumpers | Dull look; dragging towel | Improves slickness; easier waxing |
| Bug residue (after wash) | Front end, mirrors, windshield | Stubborn spots | Helps remove remaining bonded residue (use dedicated bug remover first) |
| Light tar specks | Rocker panels, behind wheels | Black dots | Reduces specks; heavy tar may need tar remover first |
| Overspray (light) | Paint, glass | Sandpaper feel | Often improves; severe overspray may require professional steps |
When in doubt, use a gentle touch and do a quick test spot. If the sponge doesn’t glide smoothly even with lubrication, stop and switch to a dedicated chemical cleaner for that surface.
Consistency matters more than speed. The goal is to let lubrication and light, repeated passes do the work—never force it.
| Step | Goal | Tip |
|---|---|---|
| Wash | Remove loose dirt | Use a quality wash mitt and clean rinse water |
| Lubricate | Prevent grabbing | Re-spray often; never clay a drying panel |
| Clay pass | Lift bonded contamination | Light pressure, straight lines |
| Wipe & inspect | Confirm smoothness | Use the “baggie test” to detect remaining grit without skin oils interfering |
| Protect | Lock in results | Wax or sealant lasts longer on decontaminated surfaces |
Glass is harder than paint, but it can still haze if you clay over dirt or let the surface dry. For the cleanest finish, remove oils and film first so the clay can focus on bonded particles rather than greasy residue.
For general washing best practices and maintenance routines, the International Carwash Association is a helpful reference point. If you’re learning the basics of surface prep and detailing steps, 3M Auto Care also covers common concepts used across professional workflows.
If you’re using stronger cleaners (tar removers, bug removers, or solvent-based products) alongside claying, keep basic chemical safety in mind—ventilation, skin/eye protection, and label guidance matter. OSHA’s overview on chemical hazards is a solid starting point.
Yes, as long as the glass is pre-washed/cleaned, the surface stays heavily lubricated, and pressure remains light. Avoid dry passes and always wipe with clean microfiber to keep grit from dragging.
A dedicated clay lubricant is ideal for maximum slickness and consistent glide. A properly diluted pH-neutral car shampoo solution can work too—just keep the panel visibly wet the entire time.
It’s strongly recommended because claying leaves the surface clean but unprotected. Wax or sealant helps slow future contamination bonding and makes routine washes easier.



Leave a comment